
Target Audience in SharePoint Online (News Web part & Event Web Part)

Target Audience in SharePoint Online (News Web Part & Event Web Part)

SharePoint has target audience feature to hide and show the information for the authorized audience. That is  the way to manage the critical information only for required group of people that is called Audience.

In SharePoint Online, few out of box web parts which are following below supports audience targeting.

  • News Web part
  • Events Web part
  • Highlighted Content Web part
  • Quick links Web part
  • At Site Page library
  • Navigation links
  • Viva Connection Dashboard

In this blog, Only News Web Part  and Event Web Part will be discussed.
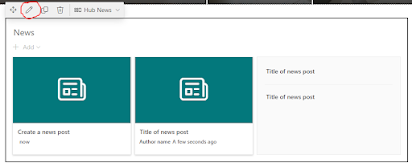
New Web part – 

Whenever any author is creating news post. It creates in Site Page library as a new page.  So enable audience targeting is a two-step process that are given below.

  1. Enable audience targeting at Page Library in which your news pages are created.
  2. Enable audience targeting at the news web part level.

We will discuss one by one each process.

Step-1 Enable audience targeting at Page Library- 

  1. Open the home page of your site and click on the site content in gear button setting in header.
  2. Select the ellipses (…) and click on settings. It will redirect to the library settings

  3. Select the audience targeting setting.
  4. Enable audience targeting and save it by click on OK button.

  5. Go to the Site Pages library and edit the existing post.
  6. Choose the audience and save the post.

Step-2 Enable audience targeting at the news web part level.

  1. To enable audience targeting in this web part, you need to move the page in edit mode.
  2. Select the new Web part and click in edit button.

  3.  In filter section, turn on the enable audience targeting.

Audience Targeting in Event Web Part-

Whenever an author is adding event, it will be added in Event List. Basically Event list has functionality like a calendar. New created Event will be shown on calendar date on which event has been scheduled.

Enable Audience targeting for Events is also two-step process.

                   1-      Enable audience at the Event List

                   2-      Enable audience at the Events web part.

We will cover each step ony by one.

Step-1 Enable audience at the Event List

           1.       Open the list setting of the event list.

           2.       Select the Audience Targeting setting and open it

3.       In this setting, there are two options for enable audience targeting which are mentioned below. 


      ·         Enable Audience Targeting-

When only this option is enabled then only Audience field will be added into the add new event form or edit existing event as mentioned in figure below.


      ·         Enable classic audience Targeting- 

When both options are enabled, then two fields that are Audience and Target audience will be added as mentioned in figure below.


Basically Target audience field supports Global Audience, Distribution list/security and SharePoint Groups to select as audience as mentioned in figure.


But Audience Field do not support Global audience options.


Step-2  Enable audience at the Events web part.

            1-      To enable audience targeting in this web part, you need to move the page in edit mode.

            2-      Select the new Web part and click in edit button .

      3-      Turn on the enable audience targeting.


Comments

Popular posts from this blog

Calendar Overlay Issue

Error - ' Unable to find  specified web in the given URL' Above given Error Message is related to SharePoint Calendar. To resolve this problem, SharePoint Calendar Overlay functionality need to be understand. SharePoint  Calendar Overlay works well for site collections in the same web application, but not for across web application. Steps for Resolve this Error- 1- Verify the Calendar Overlay Setting and clicking on Calendar Overlay button in calendar ribbon. 2- Check your URL in web URl field. This is same as defined in AAM. click on resolve. 3- Check List and List view.  Verify that your url is resolved,  Automatically all fields will be filled. List view field value will be your calendar name. 4- Click on save. Now check your calendar and your problem will be resolved. Note-  Please check out your page on which calendar is rendered before doing Troubleshooting. Thanks........

Difference between SharePoint Online PowerShell and PnP PowerShell

  Difference between SharePoint Online PowerShell (SPO) and PnP PowerShell (SPO vs PnP) Basically,  during interview these topics like Difference between SPO and PnP, Connect with SharePoint by PowerShell Command are very common to be discussed. We will start from the Difference between SPO and PnP. At the end, we will also discuss 'How can connect to SharePoint online by using the SPO and PnP commands?' Question-1 Difference between SPO and PnP?   PnP PowerShell-   It is managed by Patterns and Practices team.   It can be used for SharePoint Server as well as SharePoint Online. it means that is a  cross platform library.   It works in context of the current user. It mean that no need to have tenant level /SharePoint administrator right to manage.     It works at level of site collection.   It has wide range of commands at Site, List and Item level. SharePoint Online (SPO) PowerShell-   It is managed by Microsoft ...

Six Pillars of SharePoint-2010

Six Pillars of SharePoint SharePoint Server/ SharePoint Online has six pillars basically Six core areas that make it popular in IT industry . SharePoint Online is a cloud version of SharePoint server. it is integrated application in Microsoft 365/Office 365. 1- Sites SharePoint Sever has core functionality to  allows users to create different type of site like team, project, enterprise search center etc. in just a few clicks or hardly with in 5 to 10 mins. Newly created site will be in ready to use mode without any coding.    2- Communities SharePoint Server provides great teamwork tools like team site, news, blogs etc. that allow users to share  information, find out the information, and discuss with people with in organization boundaries. 3- Content SharePoint Provides the functionality to user to create and manage content easier as compare to other content management systems available in market. it is also integrated with  Microsoft office. ...

Disable User filtering in SharePoint 2010

Remove Disabled User from People Picker As we know experience always better then theory but good combination is experience plus theory of relative experience. This combination enhances your knowledge. Today, we have a critical reporting issue from client that is “ Employee has left organization but Employee is still in People Picker” . This issue is related to User profile Synchronization. To overcome this issue we need to creating User profile Synchronization Exclusion Filters using the Active Directory Attribute ”userAccountControl”. Exclusion filter has an advantage of reducing the amount of “Junk” in the profile database and also decrease the time taken to perform synchronization. The userAccountControl attribute is used to store the account options for an AD user object. These options include the status of the account (e.g. disabled, or locked out). Each option is a property flag. These flags are cumulative and thus there is only ever one value for userAccou...

Create file with dynamic name by using PowerShell

Power Shell is a scripting language which has amazing capabilities to automate the administrative tasks without any intervenes. By using it, log files can be created and deleted after some duration like after 7 days, 30 days etc.   This is a common task that is performed by window administrators. Let me take an example like Application logs files are created in production environment. Day by Day Size of the log folder is increased due to log files those are created on daily bases. In directly, log folder is utilizing the server space. This will affect the server performance. To clean the log folder dynamically on daily bases, Power shell script can help. Below we will write the script to perform same task by understanding with below mention topics. How can create a log file with dynamic name by using PowerShell? How can delete log files after 7 days by using Power Shell? How can create a log file with dynamic name by using PowerShell? Main problem is log files name must be un...

Group Types in Office 365

  Microsoft Office 365 Groups Office 365 Groups are also used in SharePoint Sites with SharePoint groups. Mostly recommended Office 365 group by Microsoft is 'Office 365'.  Each office 365 group is created after completing below given steps -   Group Type    Basics   Settings(This is not applicable for Security Group)   Owners (This is not applicable for Distribution, mail-enabled security and Security)  Finish Group Type - There is four types of office 365 groups.  Office 365 - (By Default, it is recommended)  This allows teams to collaborate by giving them a group email and a shared workspace for conversations, files, and calendars. This is a default setting while creating the group and this is the recommended one. Distribution - Send Email to all members of the list                                          ...

MetaData Navigation

Managed MetaData In SharePoint  In this blog, we are going to discuss Some issues related to Managed Metadata,Terminology etc. And some questions like  How can attached a url with term and what is limitation with of metadata navigation.Let's start.  Basically Metadata service provides a central location to store Metadata. Meta data is defined as "Data about Data". Metadata can be used across site collection and web application through Content type. Managed Metadata has some key terminology like Term Set, Term, Group etc. Issue- Navigation option is not in Look and feel section in site settings.  Solution-   This is because the publishing feature is not enabled for the site. In order for navigation to appear, we have to enable the SharePoint Server publishing feature from Site Settings -> Site Collection Administration -> Site Collection Features ->SharePoint Server Publishing Infrastructure. Issue- Managed Metadata is not...

Improve Performance of SharePoint Site and SharePoint Server

By using below given ideas we can improve SharePoint Server and Site Performance. Performance of SharePoint server  is depend on multiple technologies like IIS and SQL Database server. To improve performance command methods are following- Minimize Page Size - If page size is minimum then it will take less time to be render the information. Number of Web Part on Home Page - In SharePoint Site, Each page consists of Web Part . If  number of Web Part is less, Home page will  take less time to be loaded. Image and Video Size- If Site has multiple images on a page and video. it's impact the performance. Therefore use the limit number of image and video on page. IIS Compression - Compression reduces the size of page, files like image and video. there are two type of IIS Compression  in which one is static compression and second is dynamic compression. Network Bandwidth - Network bandwidth is also one of the cause for the slowness on site. some time network is slow due t...

Copy-PnPFolder: The Remote Server Returned an Error: (404) Not Found.

Error Statement-  Trying to  Copy SharePoint Document Library folder from Site to another site by using PnP Command as mentioned below- Connect-PnPOnline  https://tenantname1.sharepoint.com/ $sourceurl=   "Documents/MyProjectfiles" $targeturl=  "https://tenantname2.sharepoint.com /sites/otherproject/Shared Documents" Copy-PnPFolder -SourceUrl $sourceurl -TargetUrl $targeturl -Overwrite Run the script but getting below given error. Copy-PnPFolder: The Remote Server Returned an Error: (404) Not Found. Solution- In above script, Source URL is of tenantname1 and target URL is of tenantname2.  In SharePoint Online, Data can not be copied between two tenant.  Copy-PnPFolder can copy data in  same site, same site collection, or even in different site collection in same tenant. That's why command is return error.